645M-4 OpenVPN Routed
645M-4 OpenVPN Routed LAN to LAN communication
The following application note demonstrates the configuration of the ELPRO 645M-4 cellular modem in a Routed OpenVPN Server and Client configuration. OpenVPN is an open sourced commercial software that implements a Virtual Private Network (VPN) to create a secure Point to Point link, either Bridged or routed between two locations. It can be used with a wide variety of network layer protocols and is capable of traversing network address translators (NATs) and firewalls. It can be used with a Private Fixed IP system or a Public Dynamic Cellular network, OpenVPN authenticates with each peer by using pre-shared secret keys, certificates and/or username/password.
Certificate generation
Modem Generation
OpenVPN certificate can be generated in the modem by running some scripts via a Telnet session however it is recommended that the certificates generation be done using a computer as some of the key generations requires a large amount of processing and can take some time when generated in the modem and it is far better and a lot quicker if it can be generated using a PC. If you wish to Generate the certificates internally, please contact support@elpro.com.au for instructions.
 OpenVPN Generation
Download from the following web address and locate the appropriate installer for your operating system.
https://openvpn.net/community-downloads/
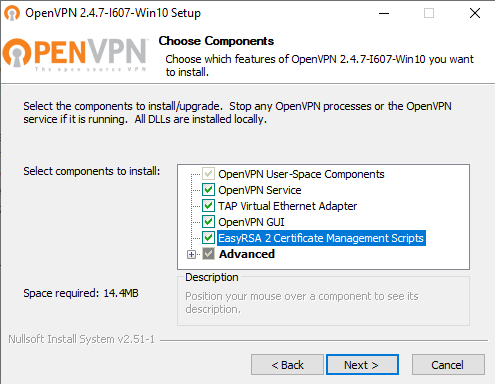
Run the installer and make sure to install the “EasyRSA2 Certificate Management Scripts”.
Initialisation
When complete, open a Command Prompt window and change directory to \Program Files\OpenVPN\easy-rsa.
Run the following batch files to configure and copy the configuration files into place.
- init-config.bat
- Edit the vars.bat file using Window Notepad and set the KEY_COUNTRY, KEY_PROVINCE, KEY_CITY, KEY_ORG, and KEY_EMAIL parameters. Don’t leave any of these parameters blank, save and close file.
- Vars.bat
- clean-all.bat
- build-ca.bat
The final command (build-ca) will build the “Certificate Authority” (CA) certificate’s and key files.
You will be asked to enter information that will be incorporated into your certificates.
For some fields there will be a default value that you configured when you edited the “vars.bat” file above, just step through the process, if you enter '.', the field will be left blank.
Country Name (2 letter code) [AU]:
State or Province Name (full name) [QLD]:
Locality Name (eg, city) [Brisbane]:
Organization Name (eg, company) [Elpro]:
Organizational Unit Name (eg, section) []: (Can leave this blank)
Common Name (eg, your name or your server's hostname) [ELPROServer]
Email Address [support@elpro.com.au]:
Note that in the above sequence, most queried parameters were defaulted to the values set in the vars.bat file. The only parameter which must be explicitly entered is the Common Name (Must not be Blank). In the example above, I used “ELPROServer”.
Generate certificate & key for server
Next, we will generate a certificate and private key for the server.
Type the following:
- build-key-server <YourServerName>
As in the previous step, most parameters can be defaulted. When the Common Name is queried, enter “Server”. Two other queries require “yes” responses, “Sign the certificate? [y/n]” and “1 out of 1 certificate requests certified, commit? [y/n]”.
Generate certificates & keys for 3 clients
Generating client certificates is very similar to the previous step.
Type the command for each Client to create certificates and keys:
- build-key client1
- build-key client2
- build-key client3
Remember that for each client, make sure to type the appropriate Common Name when prompted, i.e. “Client1”, “Client2”, or “Client3”. Always use a unique common name for each client. If more than 3 x Clients are required, then you will need to generate files for each Client.
Generate Diffie Hellman parameters
Diffie Hellman parameters must be generated for the OpenVPN server.
Type the Following:
build-dh
This process can take some time (possibly 30-120 Minutes) to create the key, depending on the key size generation parameters.
Key Files
Now we will find our newly generated keys and certificates in the key’s subdirectory. Below is an explanation of the files:
Filename | Needed by | Purpose | Secret |
ca.crt | Server + all clients | Root CA certificate | NO |
ca.key | key signing machine only | Root CA key | YES |
dh{n}.pem {n} = size 2048 or 4096 | Server only | Diffie Hellman parameters | NO |
Server.crt | Server only | Server Certificate | NO |
Server.key | Server only | Server Key | YES |
Client1.crt | Client1 only | Client1 Certificate | NO |
Client1.key | Client1 only | Client1 Key | YES |
Client2.crt | Client2 only | Client2 Certificate | NO |
Client2.key | Client2 only | Client2 Key | YES |
Client3.crt | Client3 only | Client3 Certificate | NO |
Client3.key | Client3 only | Client3Key | YES |
The final step in the key generation process is to copy all files to the machines which need them, taking care to copy secret files over a secure channel and save them to a secure location as you will need these files during the configuration of the Server and any Client modems.
Routed Application Example – Master – Slave’s
Central 645M-4 #1 Master to Slave Remote
The following OpenVPN example is performed using a public cellular network which means a Dynamic DNS port forward will also need to be configured, however it could also be setup using a Private Network. In this example each ELPRO 645M-4 will be assigned a public Cellular IP Address, configuration and a distinct LAN IP subnet address and the Server a Dynamic DNS name.

Dynamic DNS
The use of Dynamic DNS assigns a DNS name to the modem which then allows the modem to be accessed regardless of the assigned PPP IP address. There are several providers that offer Dynamic DNS "DDNS" services for example, a free service provided by “No-IP" allows users to setup between one to three host names on a domain name provided by No-IP.
In this example we are using a dynamic public IP address provided by “No-IP” and we have setup a Dynamic DNS address on the Server and each Client cellular IP Address.
Enable the DDNS and select a provider, in this example we are using NoIP.com. Enter the DDNS domain name that you have configured with your DDNS provider and the Login details for the account and “Save and Apply”.
Remember to press the “Start” button to enable the process.
OpenVPN Server Configuration
In order to create an Open VPN connection between the ELPRO 645M-4 LAN networks, we will have to define a Server in one of the units. The example illustrated at the start of this section shows an ELPRO 645M-4 modem that requires a LAN2LAN communication to another 645M-4 modem so that we can pass data between Pc’s and /or Ethernet I/O devices.
In this case, the OpenVPN Server will be configured in the Central Modem and an OpenVPN Client will be configured in the remote 645M-4 modem.
Note: The following LAN IP addresses are assigned to each 645M-4 Modem,
- 645M-4 Master – 192.168.0.1
- 645M-4 #1 – 192.168.1.1
Navigate to the “Services” / “VPN” on the left navigation bar, and then select “OpenVPN” from the menu tabs.
This is where you configure the OpenVPN Server and Client instances.
Firstly, we will configure a Server instance in one modem (Master) and then for each communication link to the remote modems you will need to configure a Client. You can setup Multiple Clients however if you need to setup a communication link between Clients you will need to configure separate OpenVPN Server/Client communication links.
After creating the Open VPN Server instance, you will need to select “Switch to Advanced Configuration” this will bring up the advanced configuration parameters.
Select “Enable” then press the “Save & Apply” button
Select “Cryptography”
Additional Field | Selected file |
“ca” | “ca.crt” |
“dh” | “dh2048.pem” |
“cert” | “server.crt” |
“key” | “server.key” |
Select “Networking” and then configure the route for the Client LAN subnet. If the “Route” parameter is not there you will need to select it in the “Additional Fields” then press the “Add” button. Then enter the IP address and Mask for the Client Lan.
In this Example the Server LAN subnet is 192.168.0.0/24, and the Gateway (modem) is 192.168.0.1. On the Client the LAN subnet is 192.168.1.0/24, and Gateway (modem) is 192.168.1.1.
Also enable the “Persistent_Tun” & “Persistent_Key” parameters.
Navigate to the “VPN” tab and then configure the “push” parameter for the Server IP and subnet. If the “push” parameter is not there you will need to select it from the “Additional Fields” press the “Add” button, then enter the Server LAN IP and subnet. To allow for Mobile Client devices to connect into the Server we also need to add a redirect of the Gateway.
Press the “+” under the push field and enter “"redirect-gateway local"” and press “Save & Apply”
Now make sure you press “Save & Activate” before leaving this page
Login using the login parameters, User = router, Password = admin!@# then type the following commands
mkdir /etc/openvpn/ccd
echo "iroute 192.168.1.0 255.255.255.0" > /etc/openvpn/ccd/<client>
Note: The IP address used is the Client LAN Subnet and Mask and the file name “<client>” should be the same name used for the naming of the Client, in the Client certificates. E.g. The name of this Client is “ElpClient1 in this example.
Make sure the “Start/Stop” button shows “Stop” if it shows “Start” then press the button.
You should then see the Server has been “Enabled” and “Started” by the indication “Yes” & “Yes (XXXXX)”.
Server Checklist
- Dynamic DNS and Start the process.
- Server Cryptography files, i.e. Load ca.crt, dh2048.pem, Server.crt & Server.key files
- Add and configure a route parameter on the “OpenVPN Server” instance “Advanced config options/Networking” tab.
- Add and configure a “push command” and Gateway Redirect on the “OpenVPN Server” instance “Advanced config options/VPN” tab.
- SSH to the modem and configure the “iroute” command
- Start the Server.
- Allow “Ping from WAN to LAN” on Network/Firewall/Security tab
OpenVPN Client Configuration
Now we will configure the Remote modem to be an OpenVPN Client.
Connect to the LAN IP of the remote modem, in our example this is on a different Subnet (192.168.1.X)
Navigate to the “Services” / “VPN” on the left-hand menu, and then select “OpenVPN” from the menu tabs and we need to configure a Client instance. You can use the “sample_client” instances or you can create a new one from scratch by typing in the name, selecting “Client routed – multi client VPN” and then the “Add” button.
Again, after creating the OpenVPN Client instance, select “Switch to Advanced Configuration” then tick the “enabled” and the “client” tick boxes and press the “Save and Activate” button.
Click “Additional Fields” and add the first field from the table below then press the “Add” button then select” Choose File” and locate the associated file that was created during the previous certificate generation phase. When found, select the “Save & Apply” button and repeat for the other Additional fields in the table below.
Additional Field | Selected file |
“ca” | “ca.crt” |
“cert” | “client.crt” |
“key” | “client.key |
Now make sure you press “Save & Activate” before leaving this page and then select the “VPN” tab.
Here you need to enter the Server cellular IP Address and the Port “1194” into the “remote” field, or if you are using Dynamic DNS as we are in this example, you will need to enter the Dynamic DNS name without the Port number.
Navigate back to the main OpenVPN page and press the “Start” button to start the Client instance.
It will change to “Stop” and you will see a “yes (XXXX)” under “Started” process.
Static Route
You will also need to “Add” a Static Route on the Client modem so that it can communicate to the Server LAN
Navigate to the Network/Static Route and select “Add” to add a new route for the Server LAN IP Subnet and for it to use the OpenVPN interface.
Client Checklist
- Dynamic DNS and Start the process (If required).
- Load Client Cryptography files, i.e. ca.crt, ClientX.crt & ClientX.key files
- Add and configure the Server Address on the “OpenVPN Client” instance “Advanced config/VPN” tab.
- Start the Client.
- Allow “Ping from WAN to LAN” on Network/Firewall/Security tab
- Add Network/Static Route for Server Subnet via the OpenVPN interface.
Tunnel Communications
The tunnel between server and client should be setup successfully and the client and server can access each other using the virtual IP address range (will vary with setup but will be something like 10.8.0.0/24 or 10.0.100.0/24).
You can check the interface status page for details on the Open VPN connection.
Server
Client Network/Interface Overview will show a similar Open VPN status which will show the virtual Tunnel IP address.
System Log
Check the “System Log” and if you see “Error: TLS handshake failed”, this means OpenVPN server and OpenVPN’s local time is inconsistency.
Please go to “System”/” System” to Sync router’s time with browser at both Client and Server.
LAN2LAN Communication tests:
You should now be able to communicate from LAN connection on the Server to the LAN connection on Client.
The first test for the OpenVPN connection is to Ping from Modem LAN to Modem LAN.
Eg, in this example the Server LAN is on IP address 192.168.0.1 and the Client is 192.168.1.1.
Navigate to the “Network / Diagnostics” Web page and enter the LAN IP address of the opposing modem.
I.e. On the Server if you enter the IP address 192.168.1.1 (Client) and press “Ping” you should get 5 x responses.
You will notice the times will reflect the over the air connection time i.e. not <1msec LAN connection time.
- The Ethernet devices connected to each 645M-4 do not have their Default Gateway IP address pointing to the 645M-4 modems LAN IP address, in this case on the Client PC and connected Ethernet devices should have their Gateway IP addresses configured for 192.168.1.1.
- The Connected Ethernet device could be blocking the incoming ICMP (Ping) commands (i.e. if a PC), this can be resolved via Windows firewall by adding an Inbound Rule.
- Check the 645M-Network/Firewall/Security – “Ping from WAN to LAN” is set to “Allow” on both the Server and Client.
te: if you also wish to have access to the Web page configuration over the Cellular network you will also need to enable the “HTTP Access” on the same security page.
This can be set to any IP, a specific Subnet or IP Address.
Related Articles
641M - OpenVPN Client with Username & Password
This document contains information regarding the configuration and use of OpenVPN client with username and645M-4 - Connect a mobile device to an OpenVPN Server
The following application note demonstrates the configuration and setup needed to connect a mobile Device, either a Tablet, Phone or PC to an ELPRO 645M-4 cellular modem using OpenVPN. It goes into detail about creating the OpenVPN certificate ...Generate OpenVPN Certificates
This document contains information regarding how to generate the certificates for OpenVPN on Windows OS.641M - OpenVPN Client with Pre-shared Key
This document contains information regarding the configuration and use of OpenVPN client with Pre-shared key.641M - OpenVPN Client with x.509 certificate
This document contains information regarding the configuration and use of OpenVPN client with x.509 certification.